How to start. Connections with ardEEG
This page explains how to physically connect your ardEEG shield, Arduino UNO R4, and electrodes before starting a recording session.
Step 1 — Attach the ardEEG Shield
Align the ardEEG shield with the header pins on your Arduino UNO R4 and press it firmly into place. Make sure all pins are fully and evenly seated before powering on.
Step 2 — Connect the Electrodes
ardEEG uses three types of electrode connections:
- Channel Electrodes (1–8)
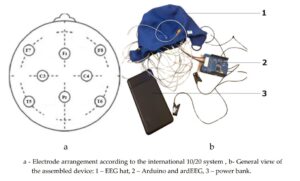
- Connect 8 EEG electrodes to channels 1 through 8. Place them on the scalp according to the 10-20 system to capture the EEG signal.
- Reference Electrode: Attach a clip electrode to one ear. This provides a stable voltage reference for all 8 channels. Bias Electrode: Attach a second clip electrode to the other ear. This actively cancels electromagnetic interference, reducing noise in the signal.
Step 3 — Power On
Connect a 5V power bank (max 1A, up to 1,000 mAh) to the Arduino UNO R4. Do not power the device from a PC USB port or mains adapter — battery power only ensures clean signal acquisition. Once powered, proceed to Software Setup to configure the firmware.