How to connect PiEEG XR
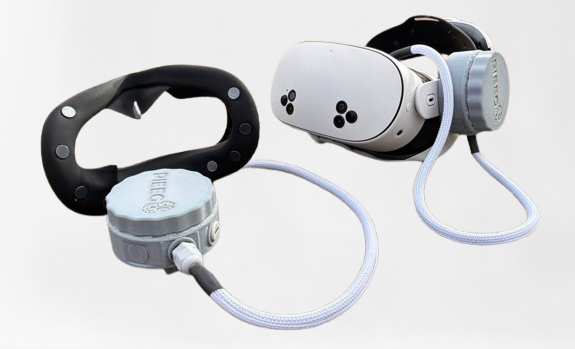
The PiEEG XR has two physical parts that attach to your headset:
- A silicone face mask with built-in electrodes. This replaces (or sits in place of) your headset's original facial interface and touches your face to pick up EEG/EMG signals.
- A BCI enclosure (box) connected to the mask by a cable. Inside the box is the brain-computer interface, which streams data wirelessly over BLE (Bluetooth Low Energy).
To set up, you swap in the mask, mount the box on the headset, and power it from a USB-C power bank. Once powered, the device starts advertising over Bluetooth under the name PiEEG XR.
[!NOTE] Example shown is for the Meta Quest 3. The enclosure and mask are configured per headset model — see the Required Equipment page for compatibility.
General view of the device:
Step 1 — Replace the Face Mask
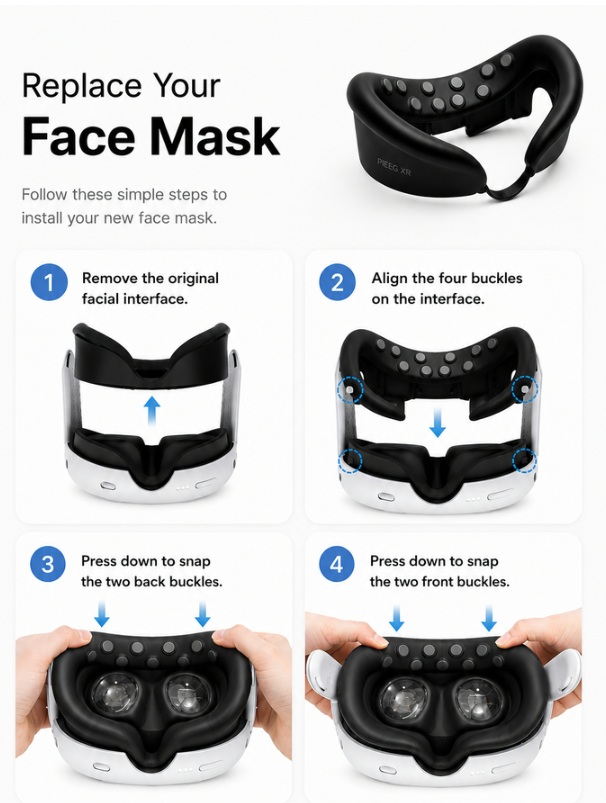
Remove the original facial interface from your headset and snap the PiEEG XR mask into place. It attaches with four buckles.
- Remove the original facial interface.
- Align the four buckles on the interface.
- Press down to snap the two back buckles.
- Press down to snap the two front buckles.
[!TIP] If you'd rather keep your existing mask, you can instead remove just the silicone insert from the PiEEG XR and fit it into your own setup.
Step 2 — Mount the BCI Enclosure
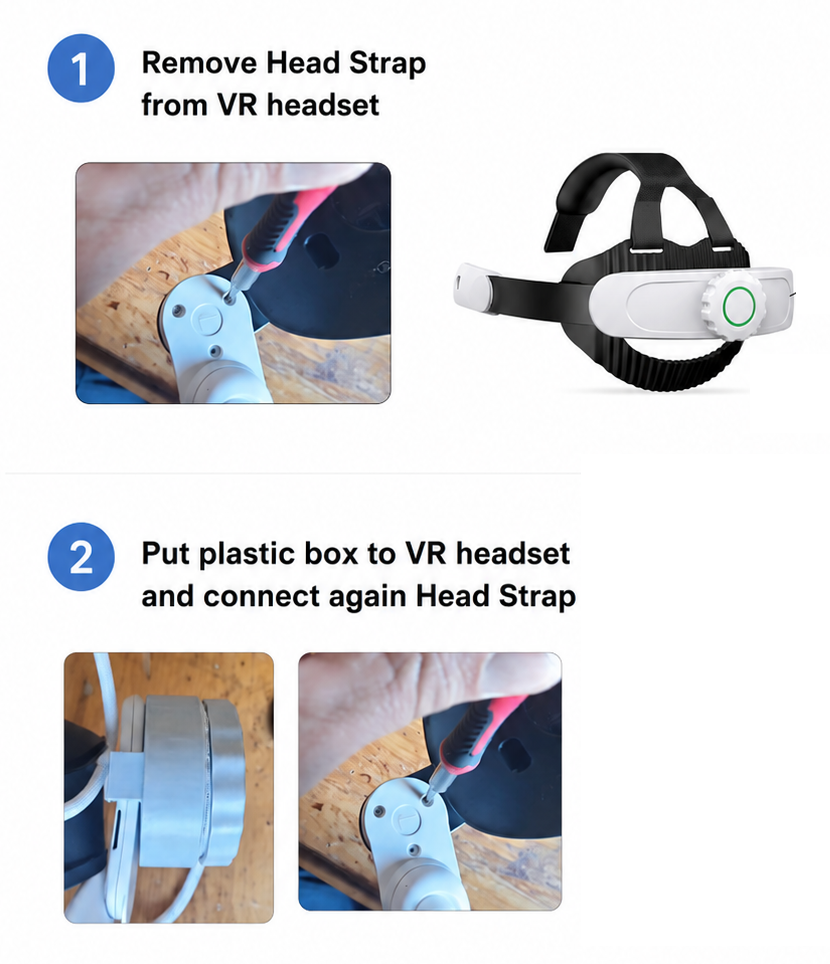
The BCI box mounts to the headset using the head strap. The best fit is achieved by removing the strap, seating the box, and reattaching the strap over it.
- Remove the head strap from the VR headset.
- Place the plastic BCI box against the headset, then reattach the head strap to hold it in place.
- Route the cable from the mask to the box. The device is now mounted.
Step 3 — Power On
Connect a 5 V USB-C power bank to the PiEEG XR.
Once powered, the device begins advertising over Bluetooth as PiEEG XR. You can now pair it and start streaming — see the PiEEG Software page for connecting and recording.