How to start
Required Equipment
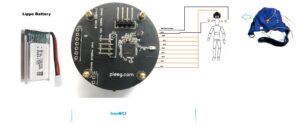
For EEG measurements:
- LiPo battery — 200 mAh recommended, 2.0 mm JST connector
- EEG cap
- 8 EEG electrodes (dry or wet) with cables — 2.54 mm connector
- 2 clip electrodes (reference and bias)
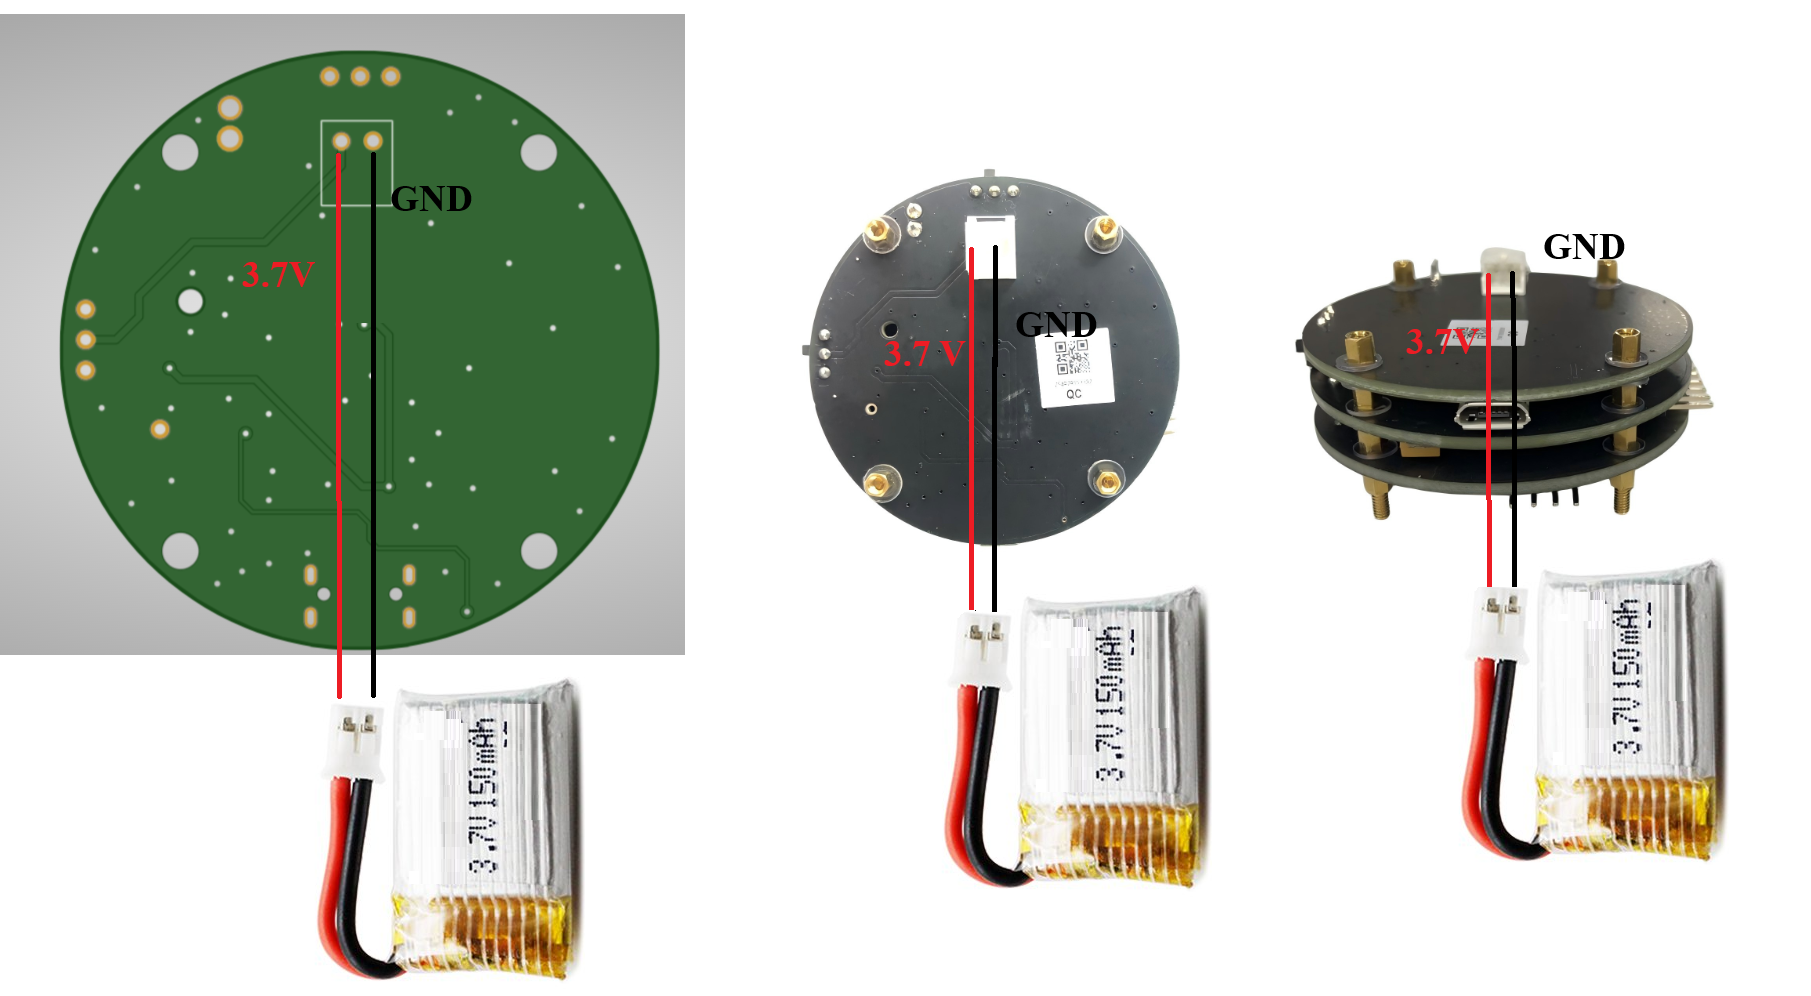
Step 1 — Connect the Battery
The LiPo battery connector is located on the bottom side of the IronBCI board. Plug in the battery before powering on.
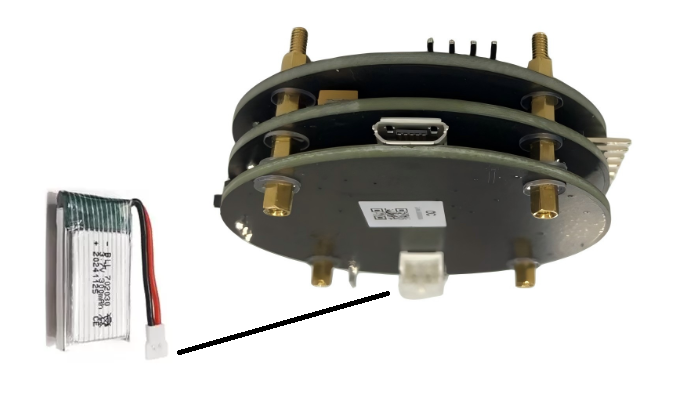
[!WARNING] Reverse Polarity Risk: Some JST connectors have reversed polarity. Before connecting the battery for the first time, verify that the polarity of your battery matches the connector on the board. Connecting a reversed-polarity battery will damage the device.
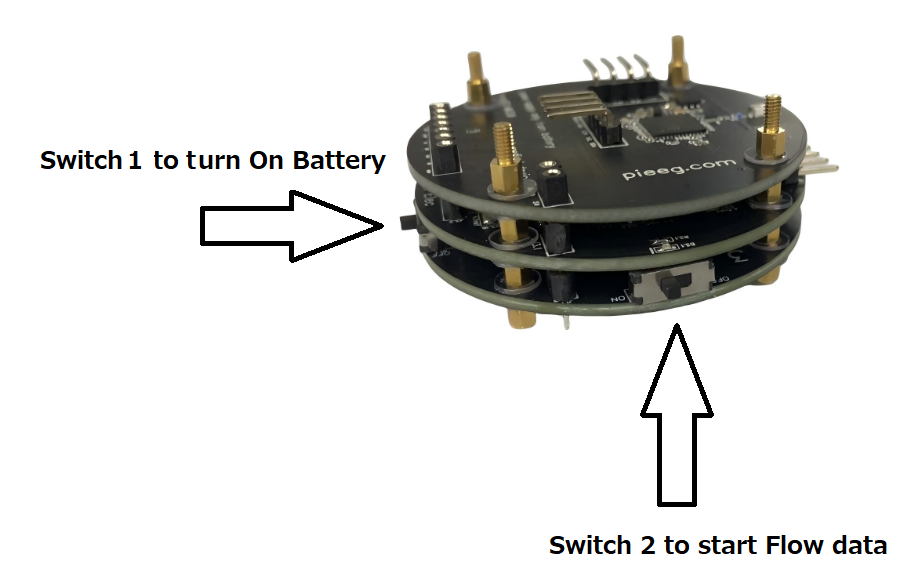
Step 2 — Turn On the Switches
IronBCI has two switches. Their states control power and charging mode.
Switch Configurations
The IronBCI has two switches that control power and charging modes. Use the table below to set the correct state:
| Mode | Switch 1 | Switch 2 |
|---|---|---|
| Normal operation | ON | ON |
| Charging | ON | OFF |
Turn both switches ON to begin transmitting data. Once on, the device starts broadcasting BLE advertisements and is ready to pair.
[!WARNING] **Do not use the device while charging. During charging, set Switch 1 to ON and Switch 2 to OFF **.
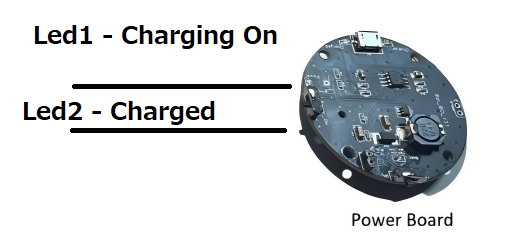
Step 3 — Charge the Battery
To charge IronBCI, connect a Micro USB cable (5V) to the charging port.
LED Indicators
| LED Status | Meaning |
|---|---|
| LED 1 ON | Charging in progress |
| LED 2 ON | Battery fully charged |
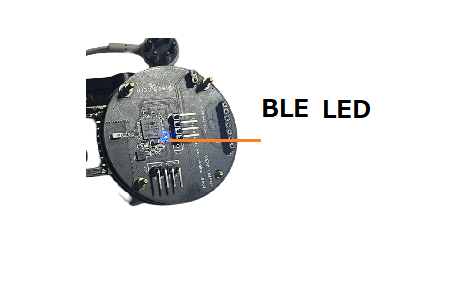
Step 4 — Verify the BLE Connection
Once both switches are ON, IronBCI begins publishing BLE advertisements. Pair it with your laptop or mobile device. When the BLE connection is established, the BLE status LED turns ON. The device then begins streaming 8 channels of biosignal data at 250 samples per second.
GitHub for ironbci (opens in a new tab)