Electrodes & Pinout
Electrode connections
PiEEG-8 has three kinds of electrode inputs.
| Input | Count | Electrode | Purpose |
|---|---|---|---|
| Channels 1–8 | 8 | Dry or wet Ag/AgCl, in the cap | Each channel measures the voltage between its electrode and the reference |
| Reference | 1 | Ear clip on one earlobe | The common 0 µV point that all 8 channels are measured against |
| Bias | 1 | Ear clip on the other earlobe | Actively drives the body to cancel common-mode noise such as 50/60 Hz mains hum |
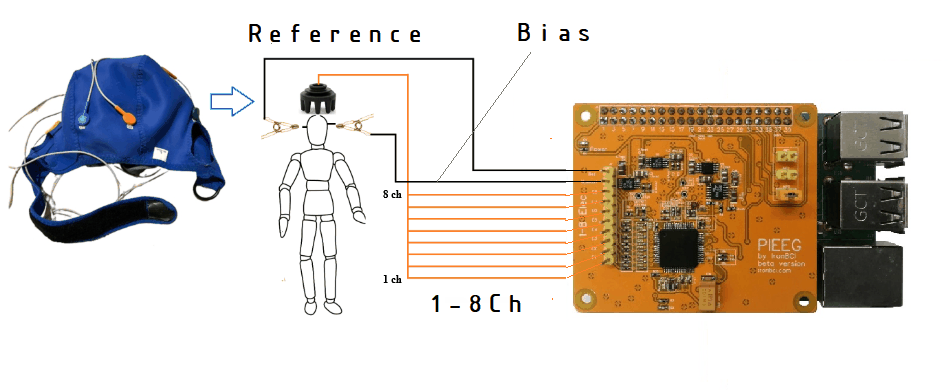
The electrode header is a standard 2.54 mm pin header, so most EEG cables with 2.54 mm (0.1") female connectors fit. Check the pitch before using a third-party cap. See Cap.

The reference and bias clips matter most. A loose ear clip makes every channel noisy at once. Clean the earlobe and make sure both clips sit firmly before you look at anything else.
Default montage
Place the electrodes on the 10-20 system. This 8-channel layout covers the front, centre, sides and back of the head, and it is the default channel naming used by BrainFlow for PiEEG.
| Channel | Position | Area | Good for |
|---|---|---|---|
| 1 | Fp1 | Front left | Blinks, eye movement |
| 2 | Fp2 | Front right | Blinks, eye movement |
| 3 | C3 | Centre left | Motor activity (right hand) |
| 4 | C4 | Centre right | Motor activity (left hand) |
| 5 | P7 | Back left, side | Parietal and temporal activity |
| 6 | P8 | Back right, side | Parietal and temporal activity |
| 7 | O1 | Back left | Alpha rhythm, vision |
| 8 | O2 | Back right | Alpha rhythm, vision |
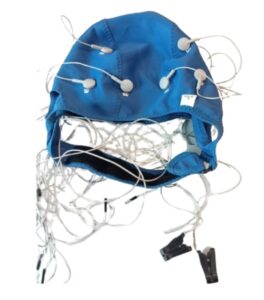
You can use any other positions. Just keep a note of which channel went where, because the software only knows channel numbers.
Fitting the cap
- Measure the head and pick the right cap size.
- Find Cz (halfway between nose and the back of the head, halfway between the ears) and align the cap with it.
- Dry electrodes: part the hair under each electrode so it touches the scalp.
- Wet electrodes: inject a small amount of conductive gel under each electrode and work it through the hair with the blunt syringe tip.
- Attach the ear clips to clean earlobes.
- Ask the person to sit still and relax the face and jaw.
Raspberry Pi pinout
The shield talks to the Pi over SPI0. Five signal pins on the 40-pin header are used:
| Header pin | Raspberry Pi GPIO | Signal | Direction |
|---|---|---|---|
| 19 | GPIO 10 | SPI0 MOSI | Pi → ADS1299 |
| 21 | GPIO 9 | SPI0 MISO (DOUT) | ADS1299 → Pi |
| 23 | GPIO 11 | SPI0 SCLK | Pi → ADS1299 |
| 24 | GPIO 8 | SPI0 CE0 (chip select) | Pi → ADS1299 |
| 37 | GPIO 26 | DRDY (data ready) | ADS1299 → Pi |
The shield also takes its power and ground from the header.
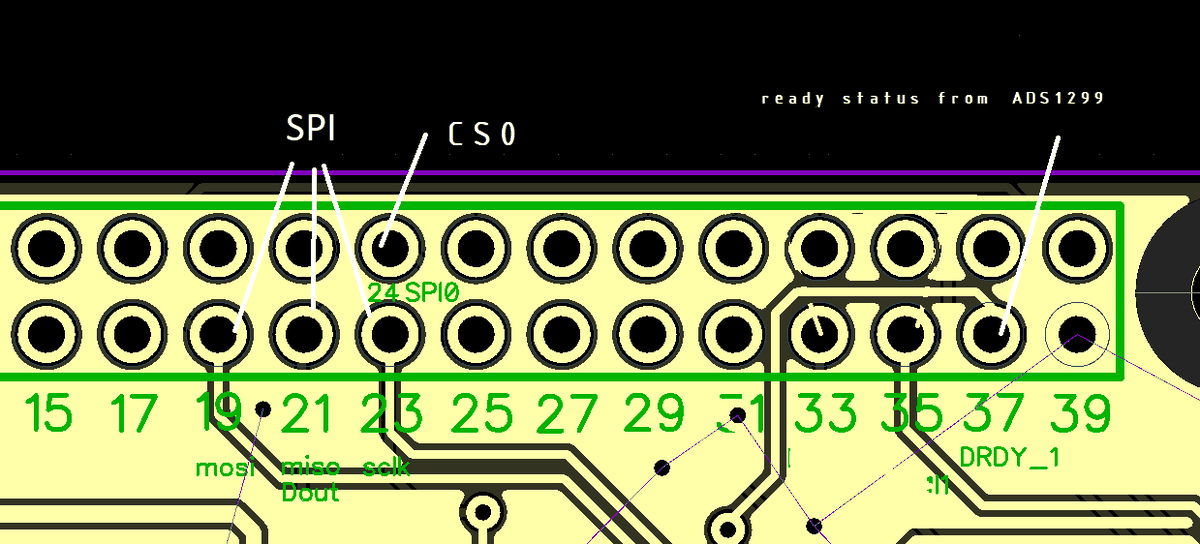
DRDY goes low each time a new sample is ready (250 times per second). Software waits for this edge, then reads 27 bytes over SPI. Details in Specification.
The other GPIO pins are not used by the shield. You can still use them for your own buttons, LEDs or triggers, as long as you can reach them with the shield mounted.